
Text: Eric Wong
How to use an LTS camera on an Empower/Sapphire NVR
This guide is to assist you in connecting an LTS Platinum IP camera with a Unisight Empower or LTS Sapphire NVR. For the most stable performance, we recommend using the LTS IP camera on a separate Power-over-Ethernet (PoE) switch. For information to connect the camera to the built-in PoE switch on the back of the Empower/Sapphire NVR. see another KB (Link)
Camera Setup
- Connect the camera and the NVR to the separate switch. Assuming the switch is already connected to the router and the NVR is already setup with an address on the same network as the router, we can setup the camera.
- Using the IP portal tool, find the LTS IP camera, select the device and activate the camera with a password of your choosing. You could also access the LTS IP camera by its default IP address via web browser and will also be presented with an activation window there.
- Once the camera is activated, change the IP address to an address that is free on the network. The first 3 numbers of the IP address should match the first 3 numbers of the IP address of the NVR.
- Log into the camera’s IP address on a browser.
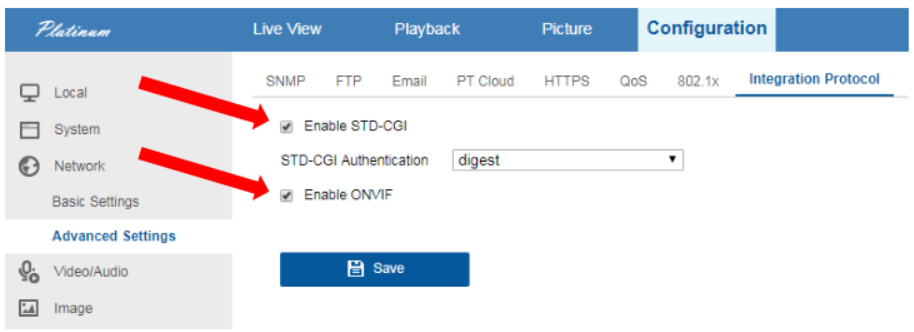
- Navigate to Configuration > Network > Advanced Settings.
- Make sure the ‘Enable STD-CGI’ as well as ‘Enable ONVIF’ is selected and check marked.
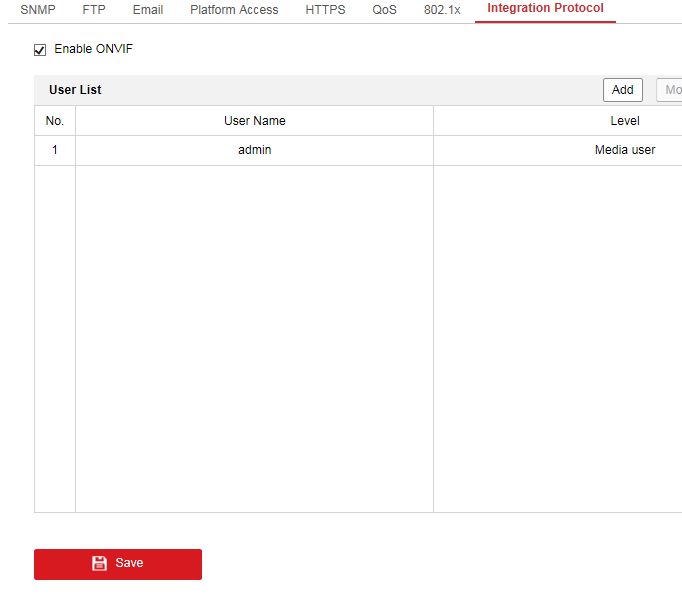
NOTE: On older versions of the current level firmware with the ‘Enable ONVIF’ setting, the ONVIF protocol uses the camera credentials for the ONVIF authentication. On some newer versions of LTS IP camera
firmwares, there is a ONVIF user management where you can set up a credential for the ONVIF authentication that is different from the camera’s credentials.
When using an LTS IP camera on an LTS NVR, by adjusting the camera settings on the NVR, the settings are also automatically synced and changed on the camera as well. With a Empower or Sapphire NVR, the settings may not sync properly with the camera, so the settings should be set before we add the camera to the NVR.
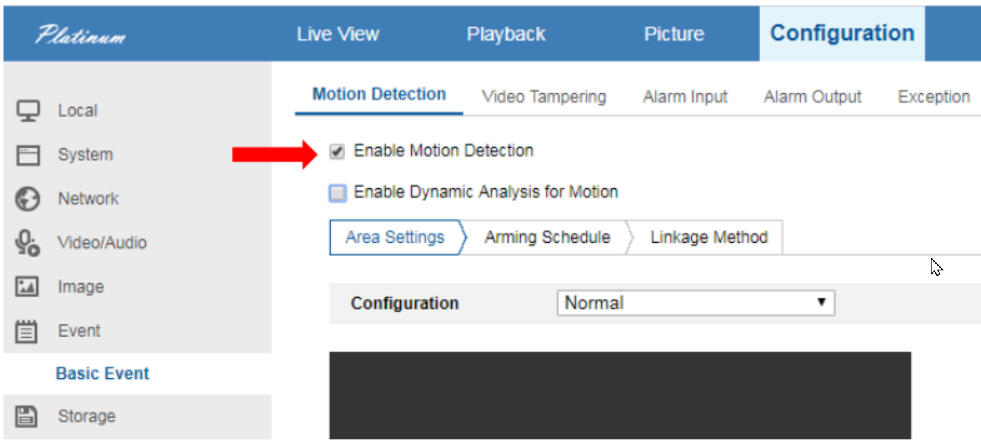
1. Navigate to Configuration >Event > Basic Event > Motion Detection.
2. Checkmark ‘Enable Motion Detection’
NVR Motion Detect Setup
In a new browser tab, navigate to the NVR’s IP address and log in. Once you are onto the main page,
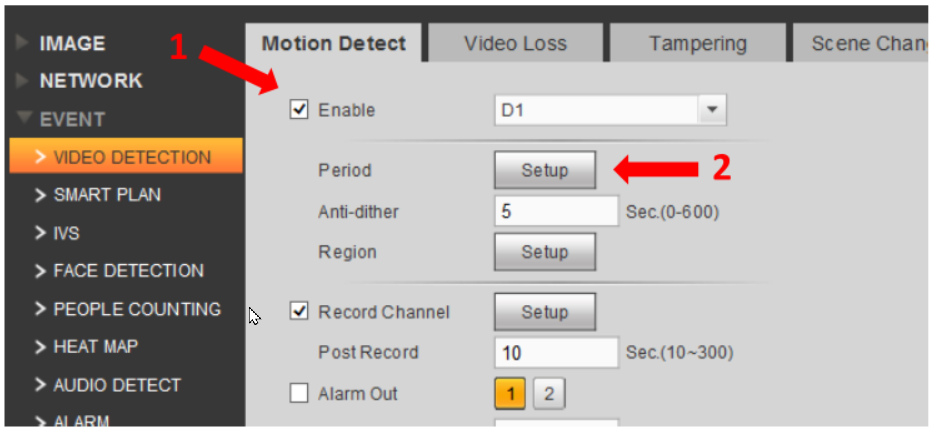
navigate to Setup > Event > Video Detection > Motion Detect.
- Make sure the ‘Enable’ checkbox is selected for the channel the camera will be added to.
- If you click the Setup button next to the ‘Period’ label, you can set up the time and date period you want the Motion Detection to be active on the NVR channel.
You may also want to copy the Motion Detect settings to other channels. In this case, click the ‘Copy’ button on the bottom of the page, select the channels you would like to copy the configuration
to and click ‘OK’. Make sure to click ‘OK’ at the bottom of the Motion Detect page to save the copied configurations.
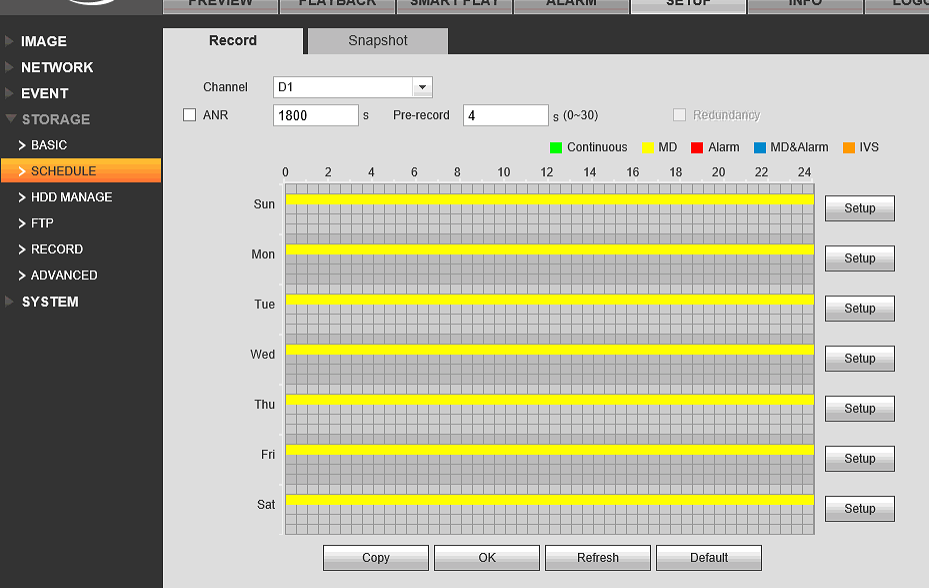
NVR Record Schedule Setup
By default, the Empower and Sapphire NVR channels are set to Continuous recording. To configure the NVR to record on motion detection, the recording schedule needs to be adjusted.
- While still on the NVR webpage, navigate to Setup > Storage > Schedule.
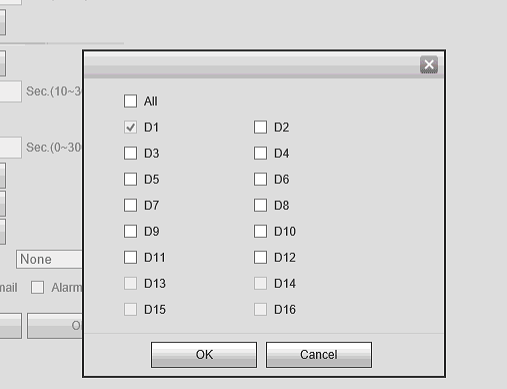
- Select the channel you are looking to modify (select ‘All’ to modify the schedule for all channels at once). Click the ‘Setup’ button next to the day of the week to adjust.
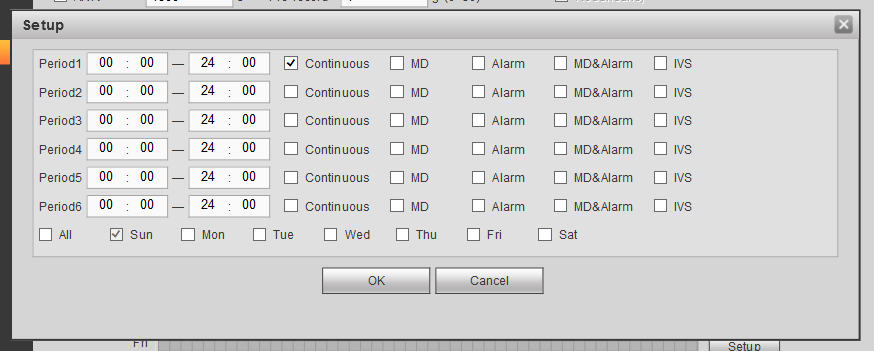
- On the Setup window that comes up, select the ‘MD’ checkbox to enable Motion detection for that period. You may want to un-check the ‘Continuous’ checkbox if you do not want the system
also recording continuously. You can also select different days of the week to copy the period and record method. - Click ‘OK’ to save the schedule.
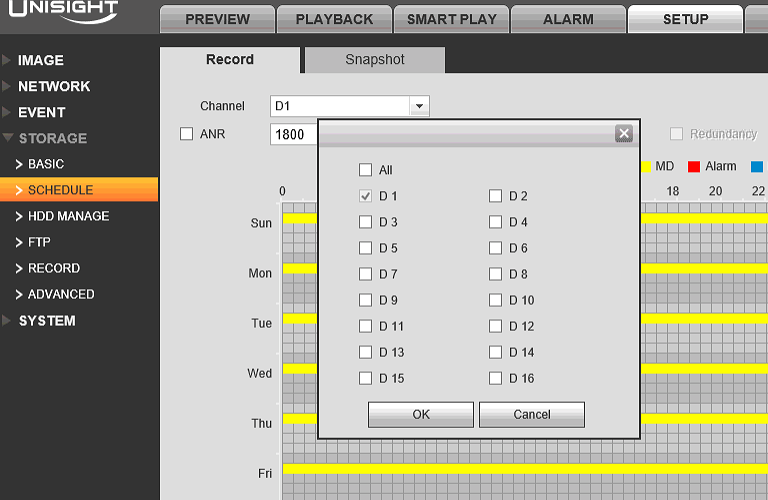
If you did not select ‘All’ for the channel selection, you can also copy the record schedule on one
channel to any other channel by clicking the ‘Copy’ button on the bottom of the Record schedule configuration page.
Adding Camera to NVR
After the initial camera and NVR configuration is complete, the last step is to add the camera to the NVR
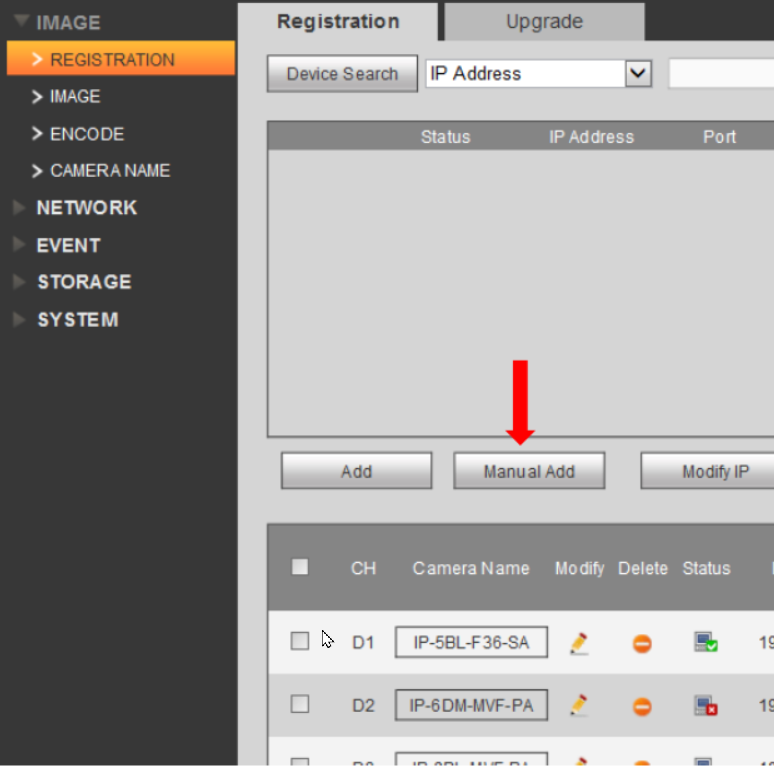
- Navigate to Setup > Image > Registration.
- The list on the top is the network device search and the list on the bottom is the list of cameras added to the system.
- Click the ‘Manual Add’ button.
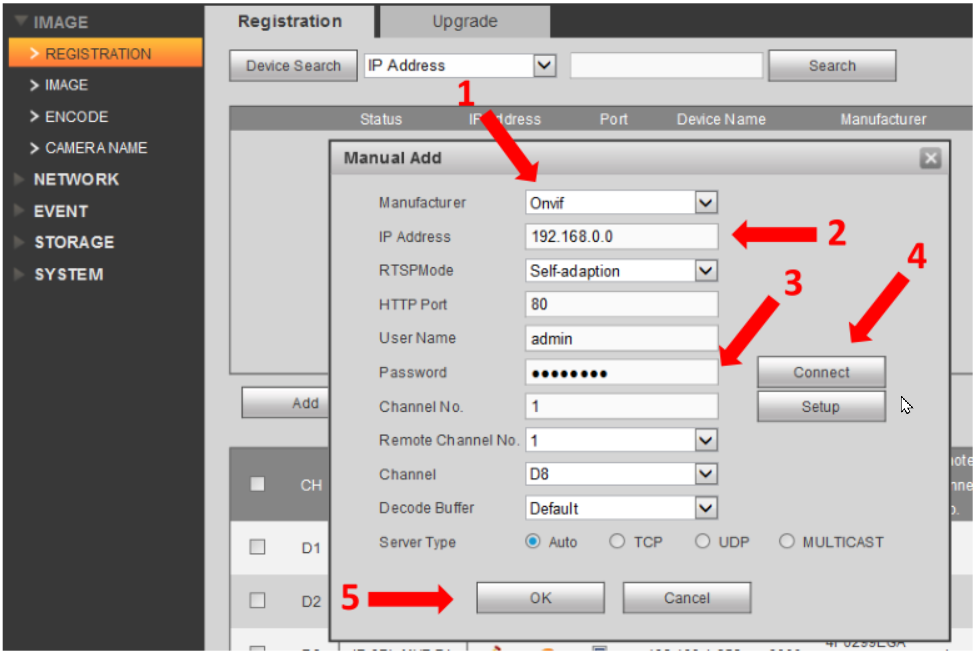
- Set the Manufacturer to Onvif (1), type in the IP address of the camera (2). Make sure the HTTP
Port is still set to 80, unless it is changed on the camera’s port. - Type in the password of the camera (3), click the ‘Connect’ button (4) and wait several
seconds. - Make sure the ‘Channel’ setting is set to the channel you want to add the camera to and click ‘OK’
(5).
Your LTS Platinum IP camera should now be connected and working with your Unisight Empower or LTS Sapphire NVR!